Extras work with product line items as an add-on. These items are only available for purchase with an associated menu item. They are a great way of increasing a customer's spend by having popular meal accompaniments and alterations available within a menu item. For example 'Eggs on toast'. You could add optional extras of bacon, avocado, halloumi, spinach and more. This allows the customer to customise their dish and you earn extra revenue.
There are 3 parts to adding an extra:
-
Build the extra menu
-
Add the extra items to the Menu Content
-
Link the extra menu to the corresponding products
Part 1: Building the Extras Menu
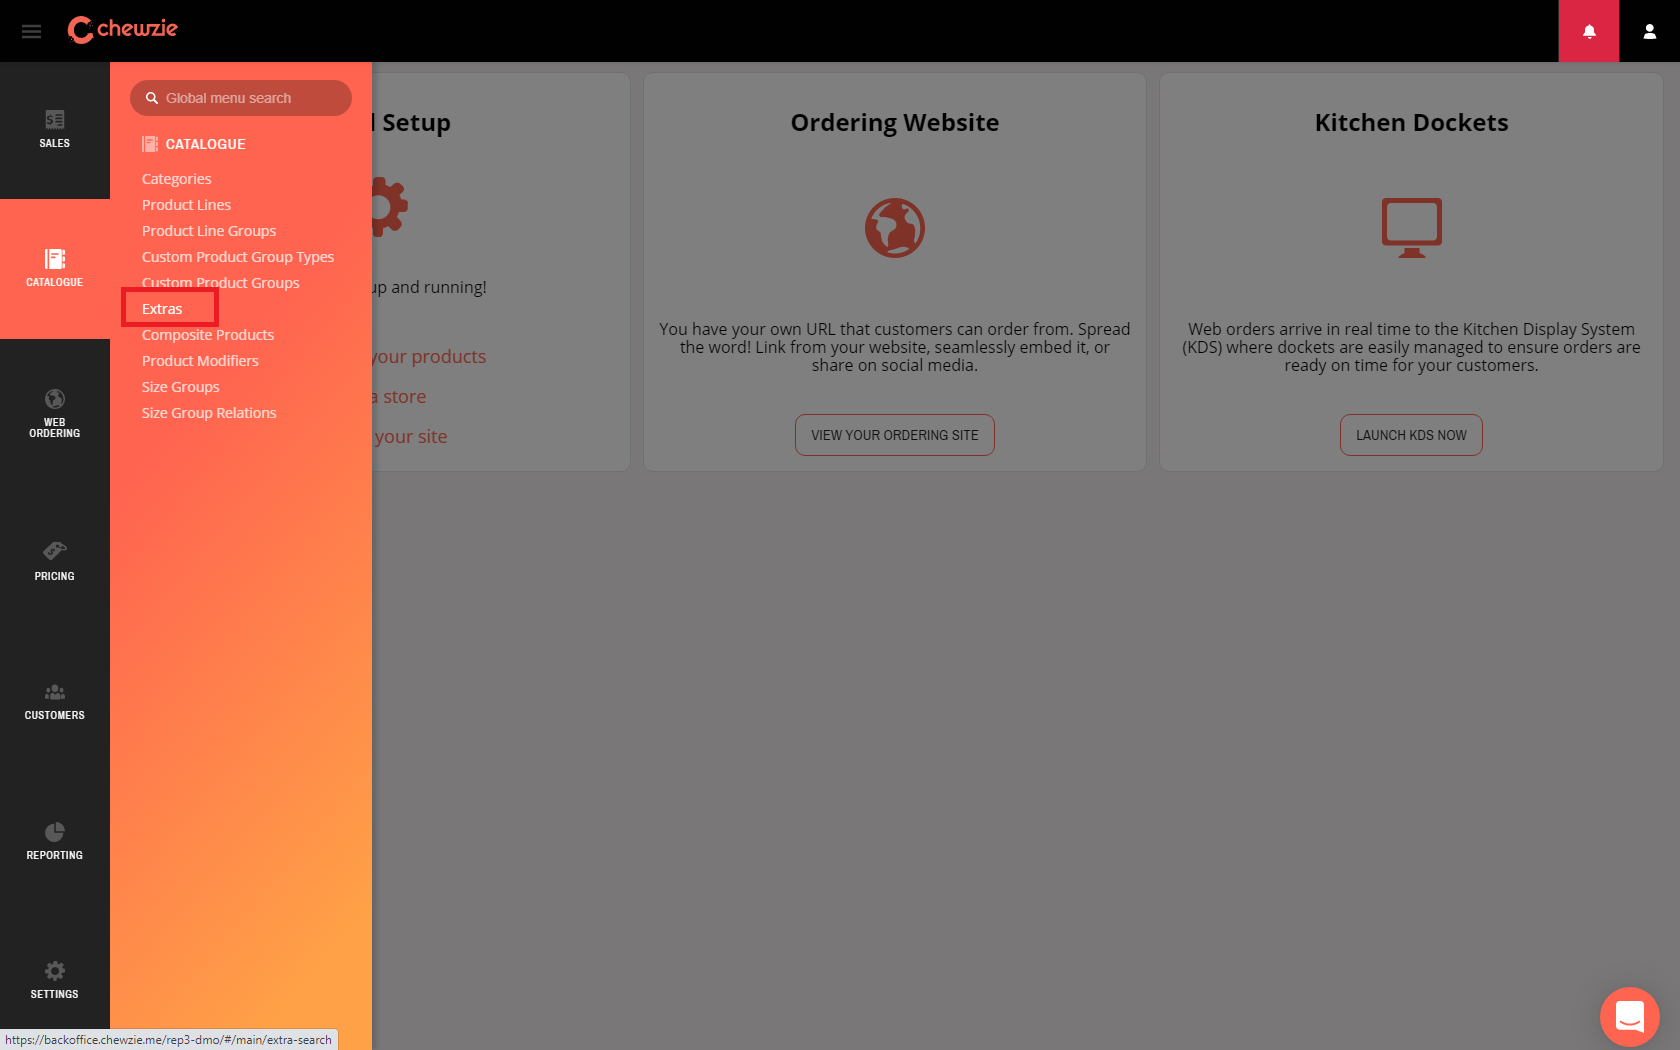
Step 1: Go to Catalogue > Extras
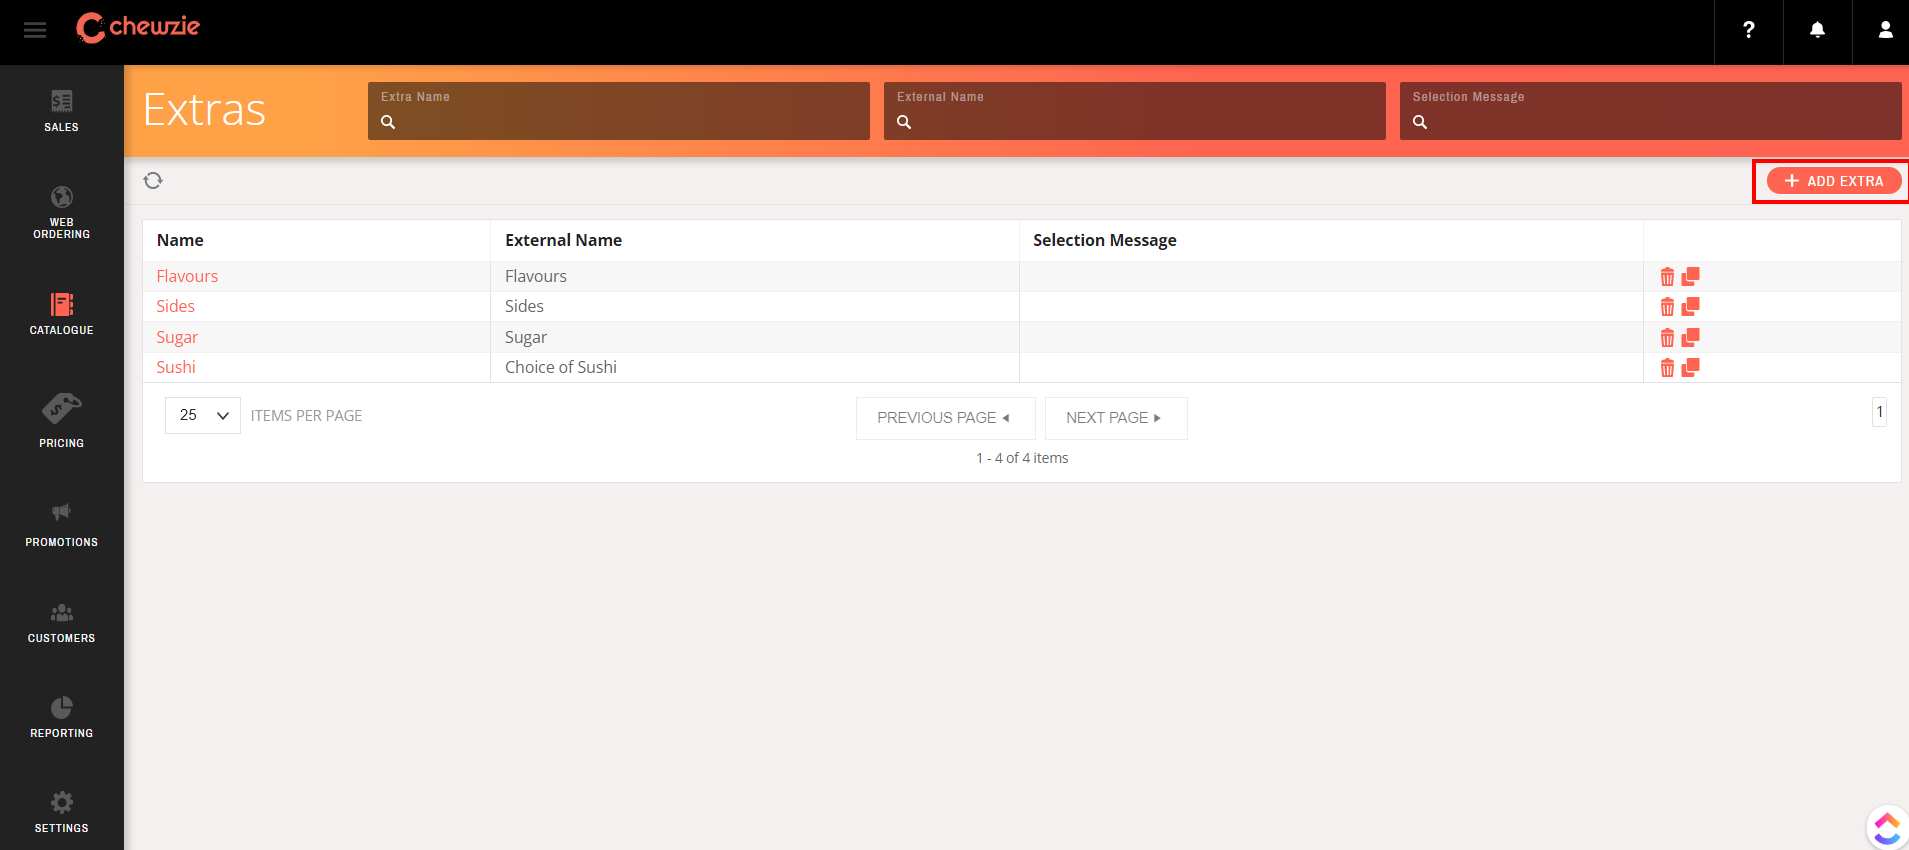
Step 2: In the top right hand corner click on + add extra
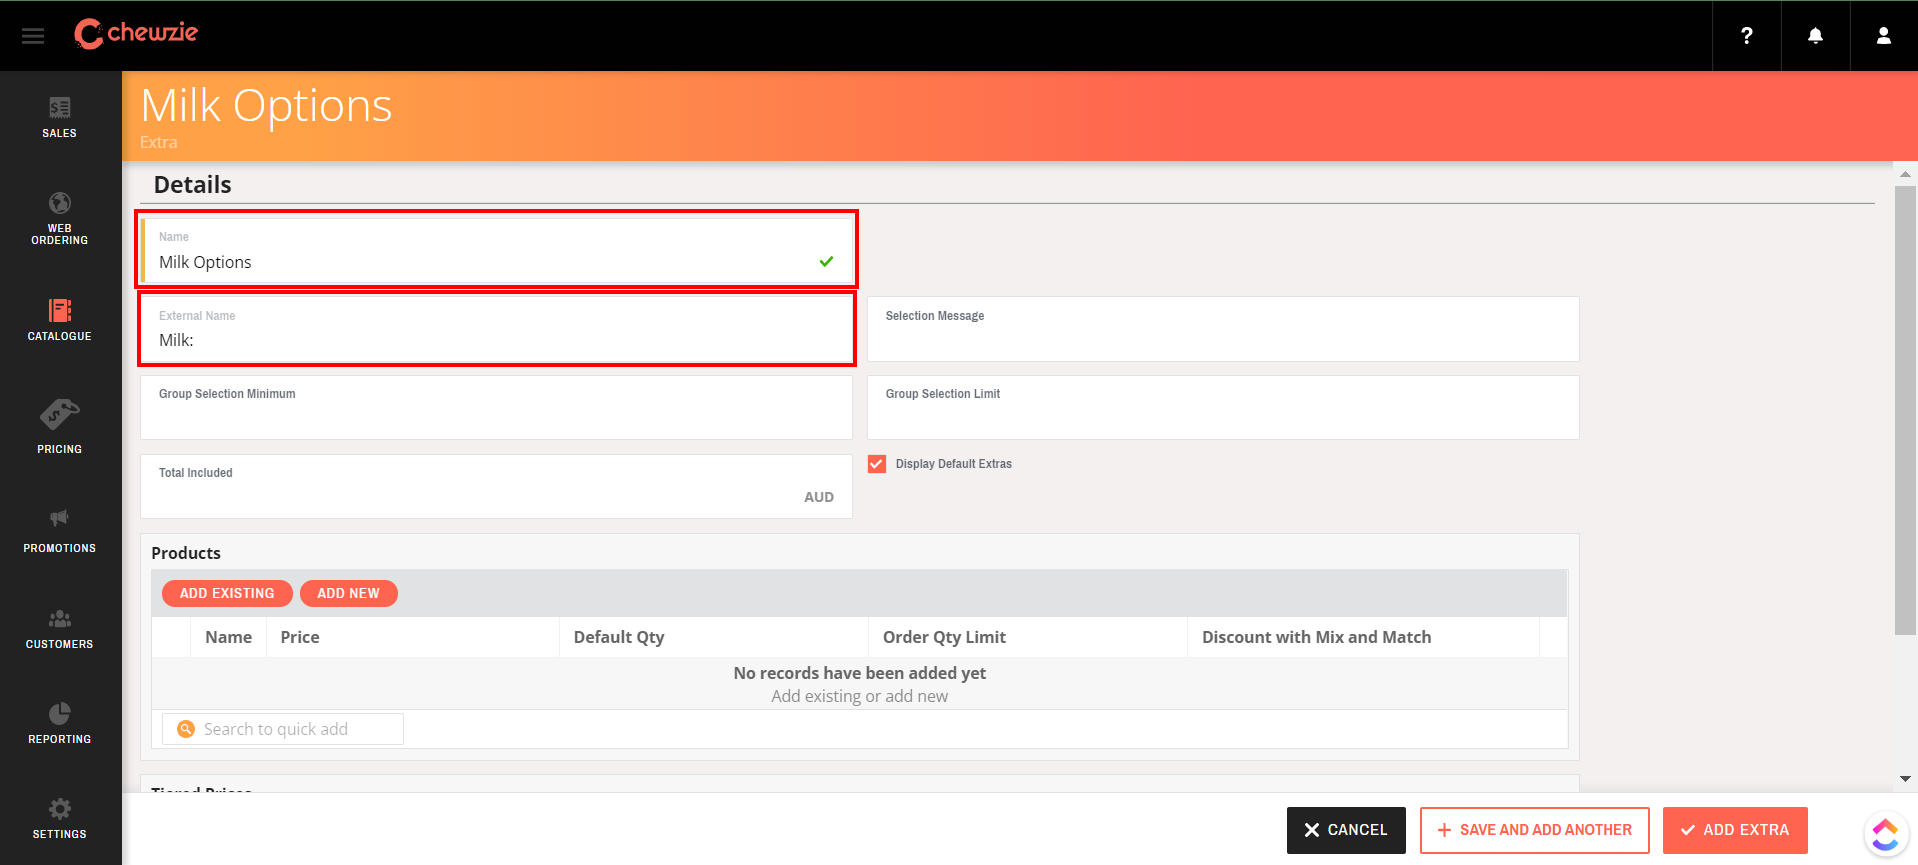
Step 3: Name your extra. This will be for internal use in the back office only. You will be able to add this extra when you are building a product later.
Step 4: External name
The extra menu will default as "Add Extra" when displayed in the menu. By putting an external name eg Sauce, this will change the menu to "Add Extra Sauce". As a standard we put a semi colon in this section so the menu appears as Add Extra: (and then the options are listed)
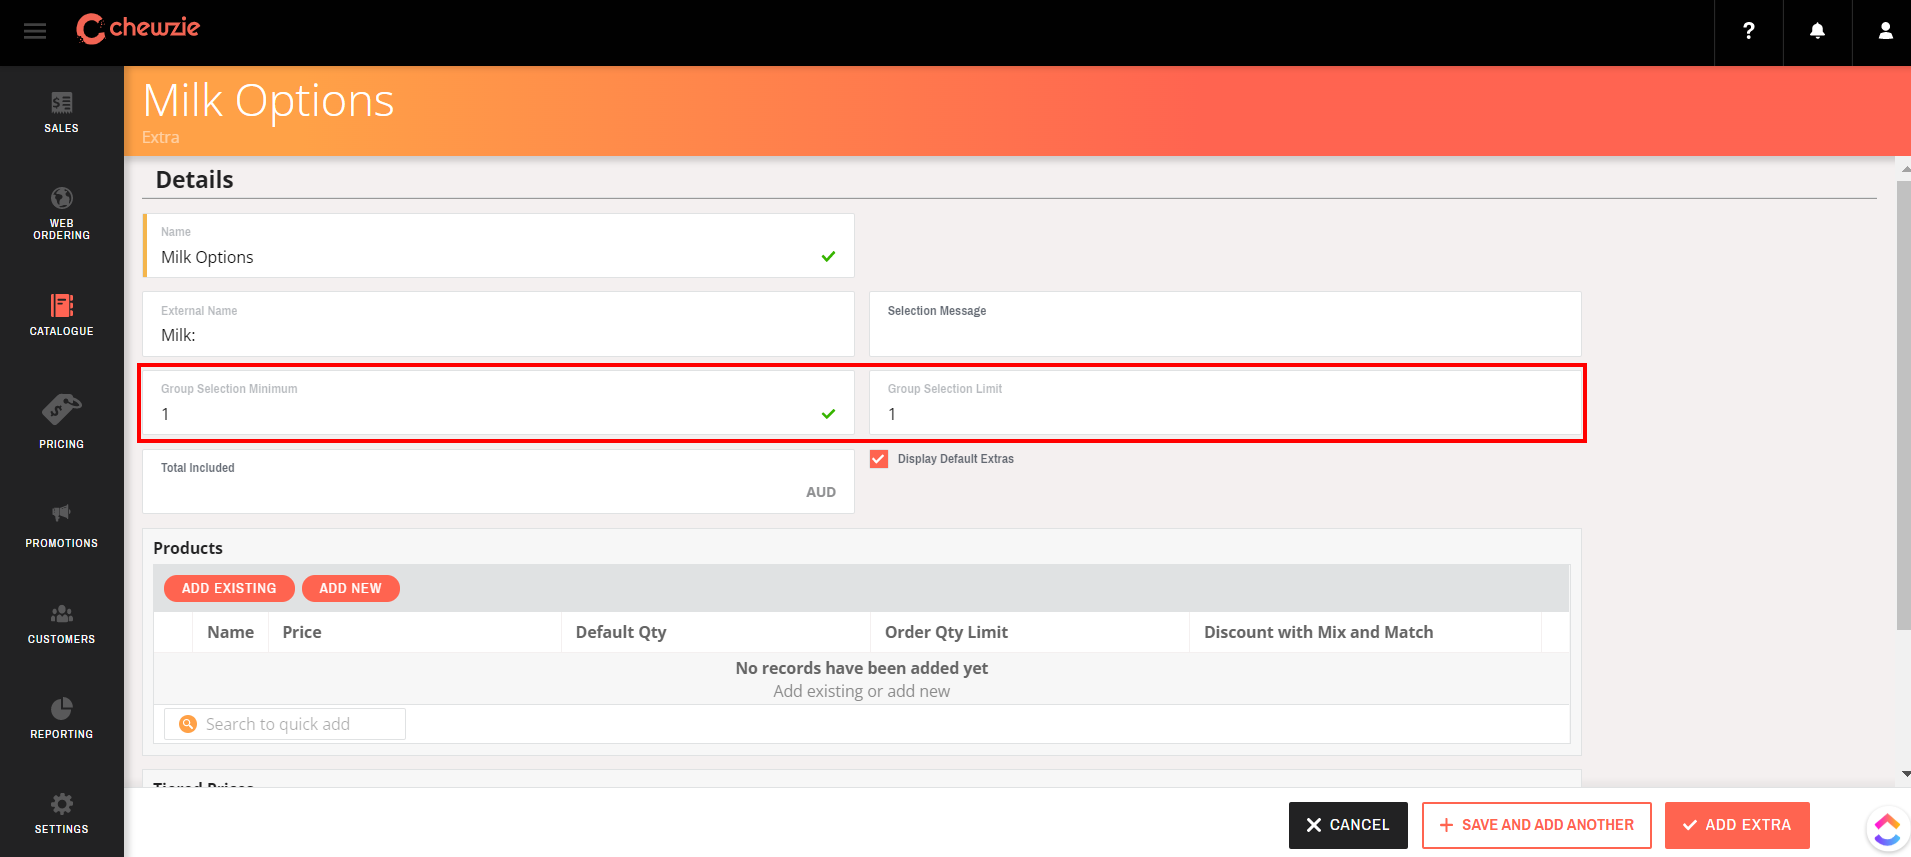
Step 5: Group Selection Minimum
This is the minimum number of extras that a patron can choose. For optional extras menu items this number will be 0. If a patron must choose between alternatives, the minimum selection will be 1. Some items might have a minimum selection of 2 or more depending on their requirements. For example, an Ice Cream Sundae that requires customers to choose 2 flavours of ice cream will have a minimum selection of 2.
Step 6: Group Selection Limit
This is the maximum number of selections a patron can choose. The options will fade out once this maximum limit is reached. In the example below, we want to make sure people choose a milk option, so the minimum will be 1. But they can only order one milk option with their coffee, so the limit is 1 as well.

Step 7: Add products to your extras menu
You may select "Add Existing" if you want to add a product that has already been set up, or create a new product line by selecting "Add New".
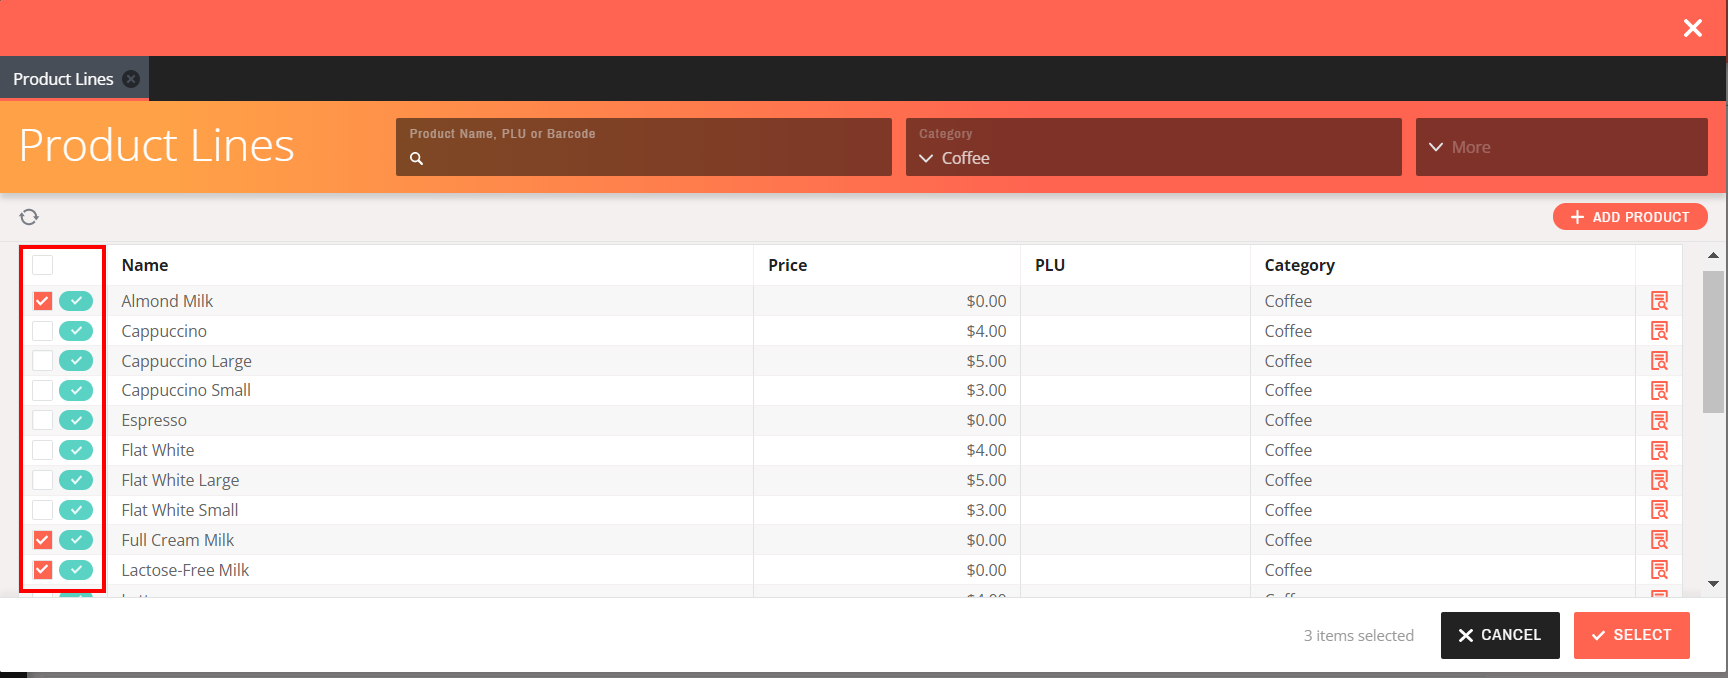
Step 7.a: Select the existing product lines you want in the extras menu by ticking the corresponding boxes on the left, and then by clicking select in the bottom right corner.
Step 7. b: Alternatively, you can add a new product as per the directions on How to create a product line.
Once you have added all the products to the extras menu, set ordering limits of each item by specifying the default quantity and the order limit quantity. This will enable your customer to order more than one serve of that extra. For example adding 3 sugars to their coffee.
Step 8. a. Default Qty
Default Qty indicates how many units of the extra you want it to default to. The standard would normally be 0, but you could opt to change this.
For example, if most customers choose to have their coffee with full-cream milk, you can set the Default Qty to 1. Now, it will automatically select full cream milk when customers order their coffee.
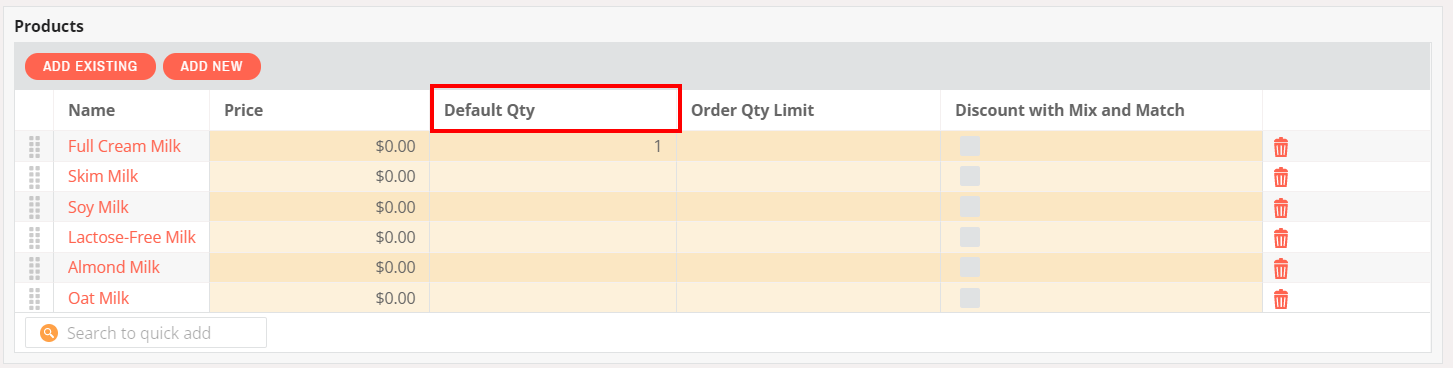
Step 8. b. Order Qty Limit
The Order Qty Limit indicates the maximum number of times that extra can be ordered. For example, you could set your Order Qty Limit for your sugars extra to 3. This means that customers will not be able to order more than 3 sugars per cup of coffee.
Step 9: Click Add Extra on the bottom right hand corner.
Part 2: Add the extra items to the Menu Content
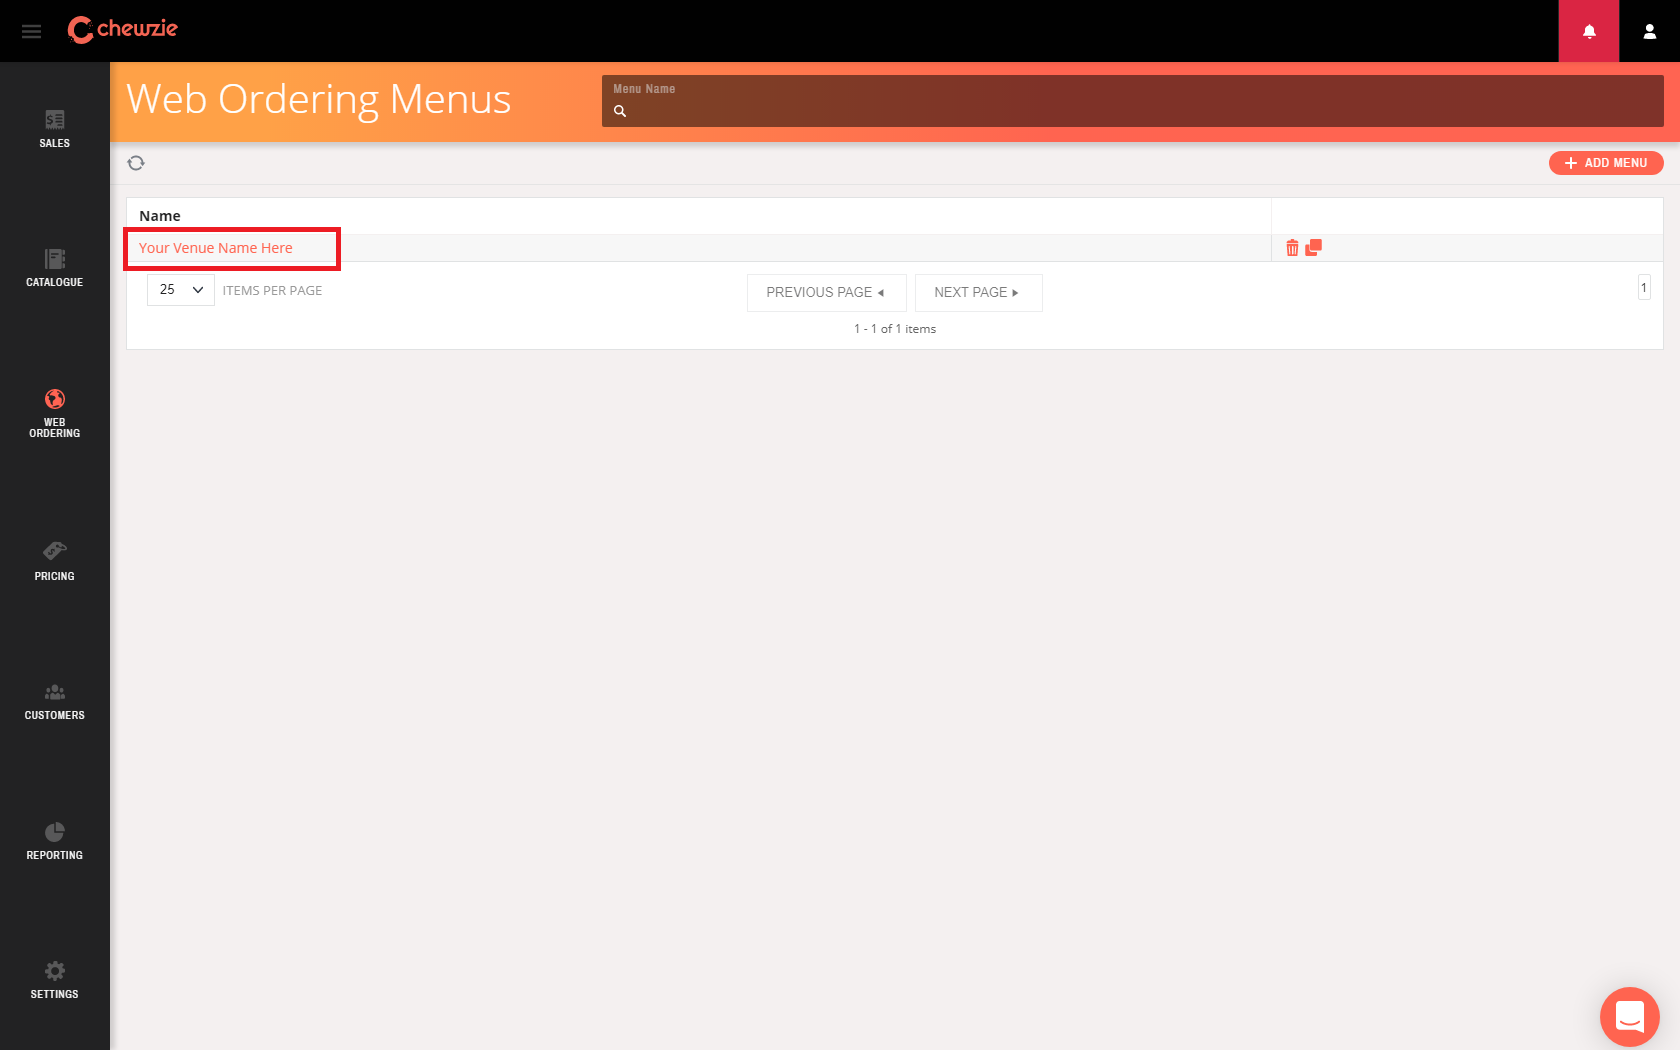
Step 1: Navigate to Web Ordering > Menus, Click on your menu.
Step 2: Select Extra items in Item Options
Step 3: Click on Add Existing> Product Lines in Extra Items
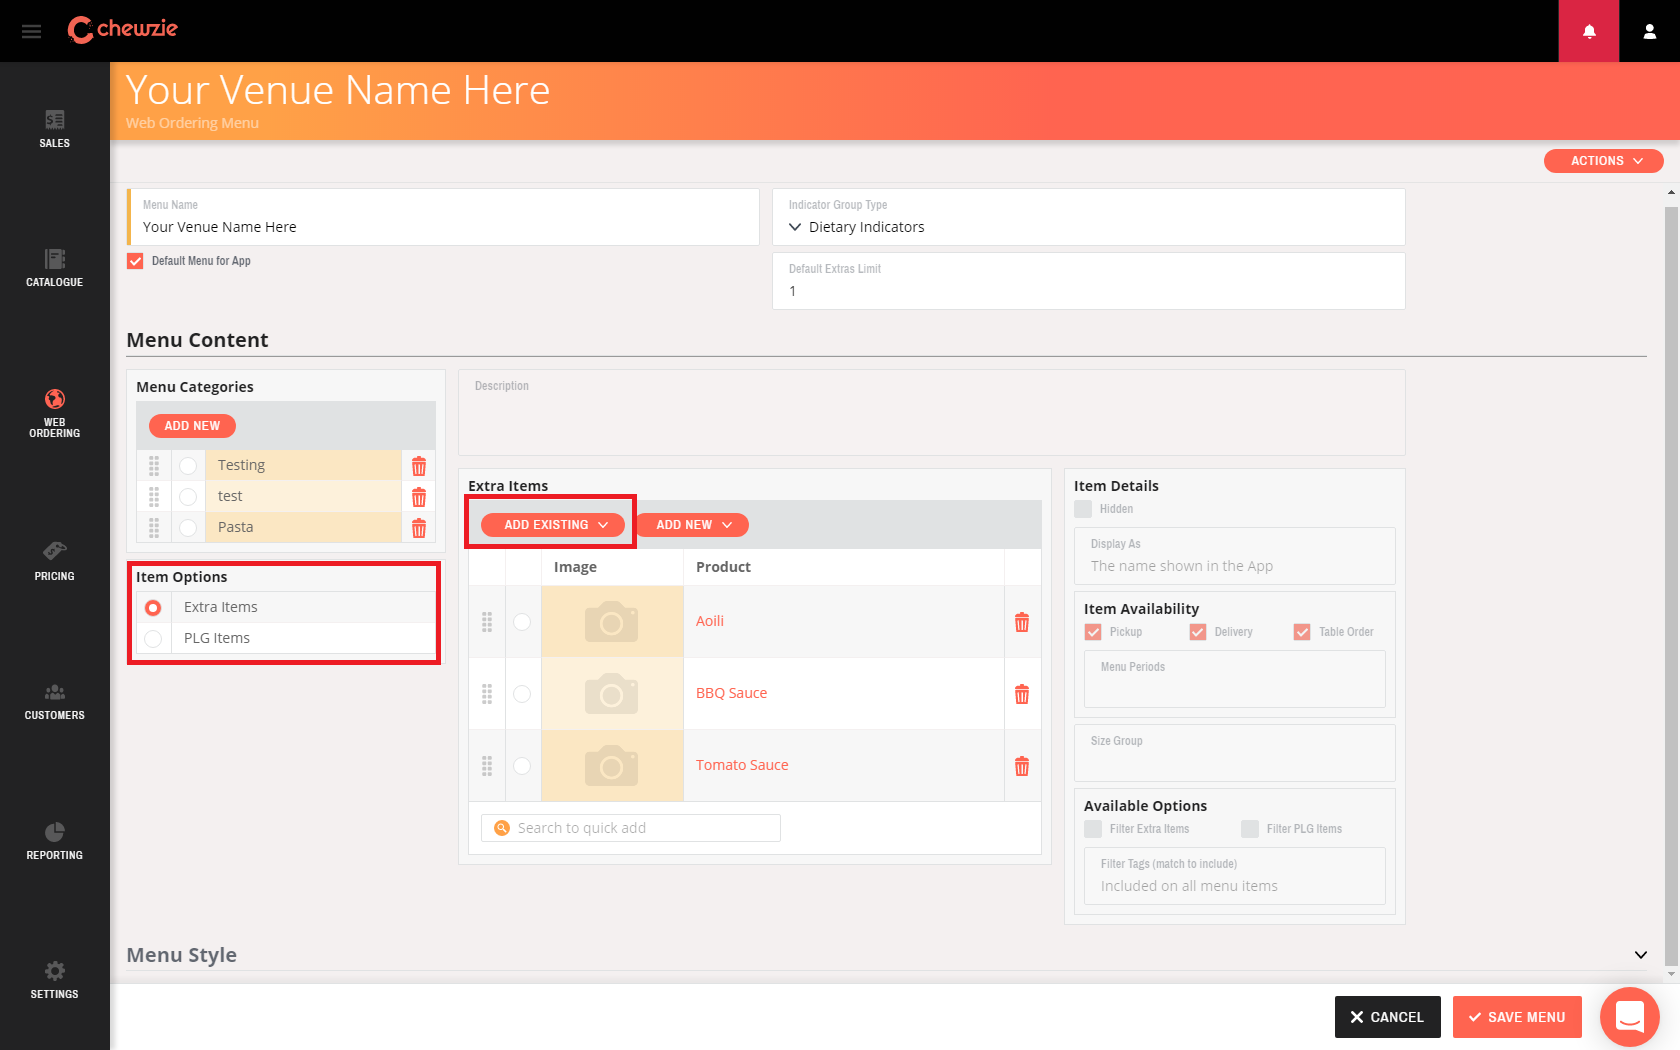
Step 4: Select the items you want in your extras menu and press select in the bottom right corner.
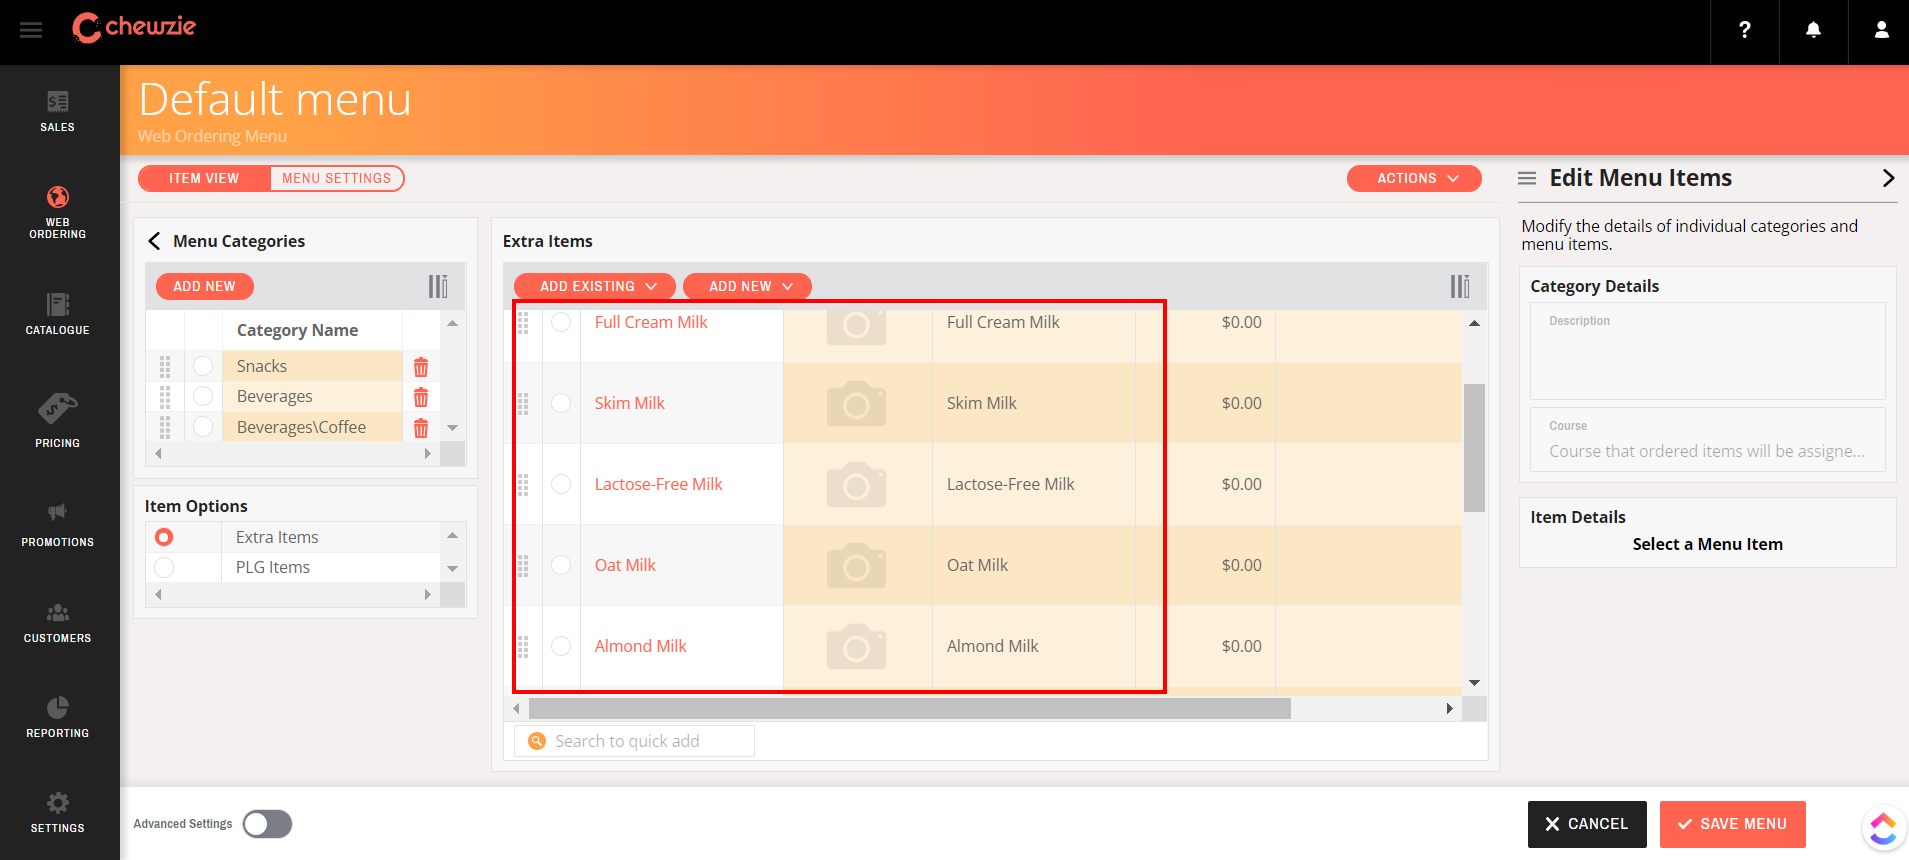
Step 5: The products available for extras menus will appear here. Click Save Menu in the bottom right hand corner to save these changes.
Part 3: Link the extra menu to the corresponding products
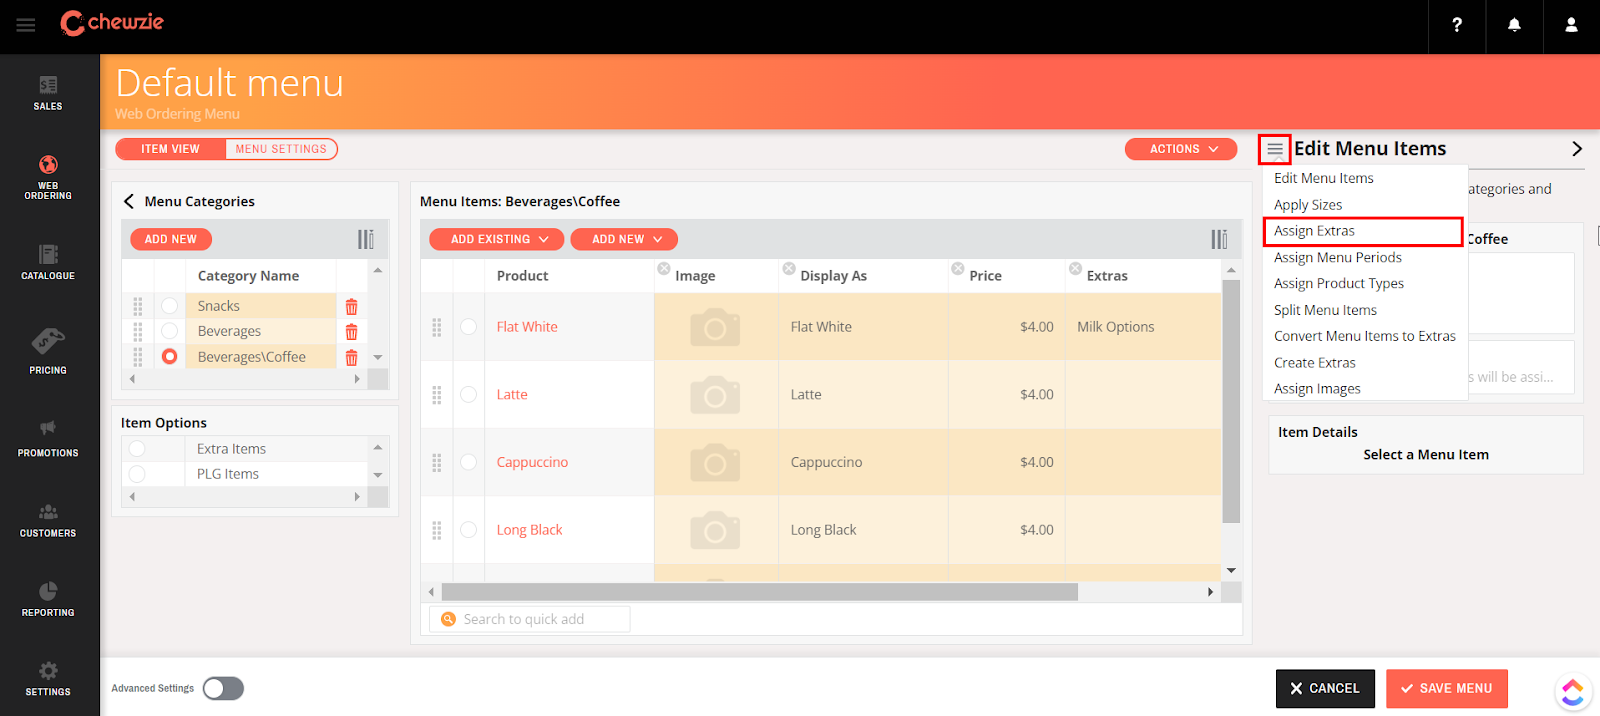
Step 1: Click on your menu
Step 2: Select the icon next to “Edit Menu Items” to open the options menu and click on “Assign Extras”.
Step 3: Select the products you want to assign the extras to and choose the Extras Group you wish to apply.
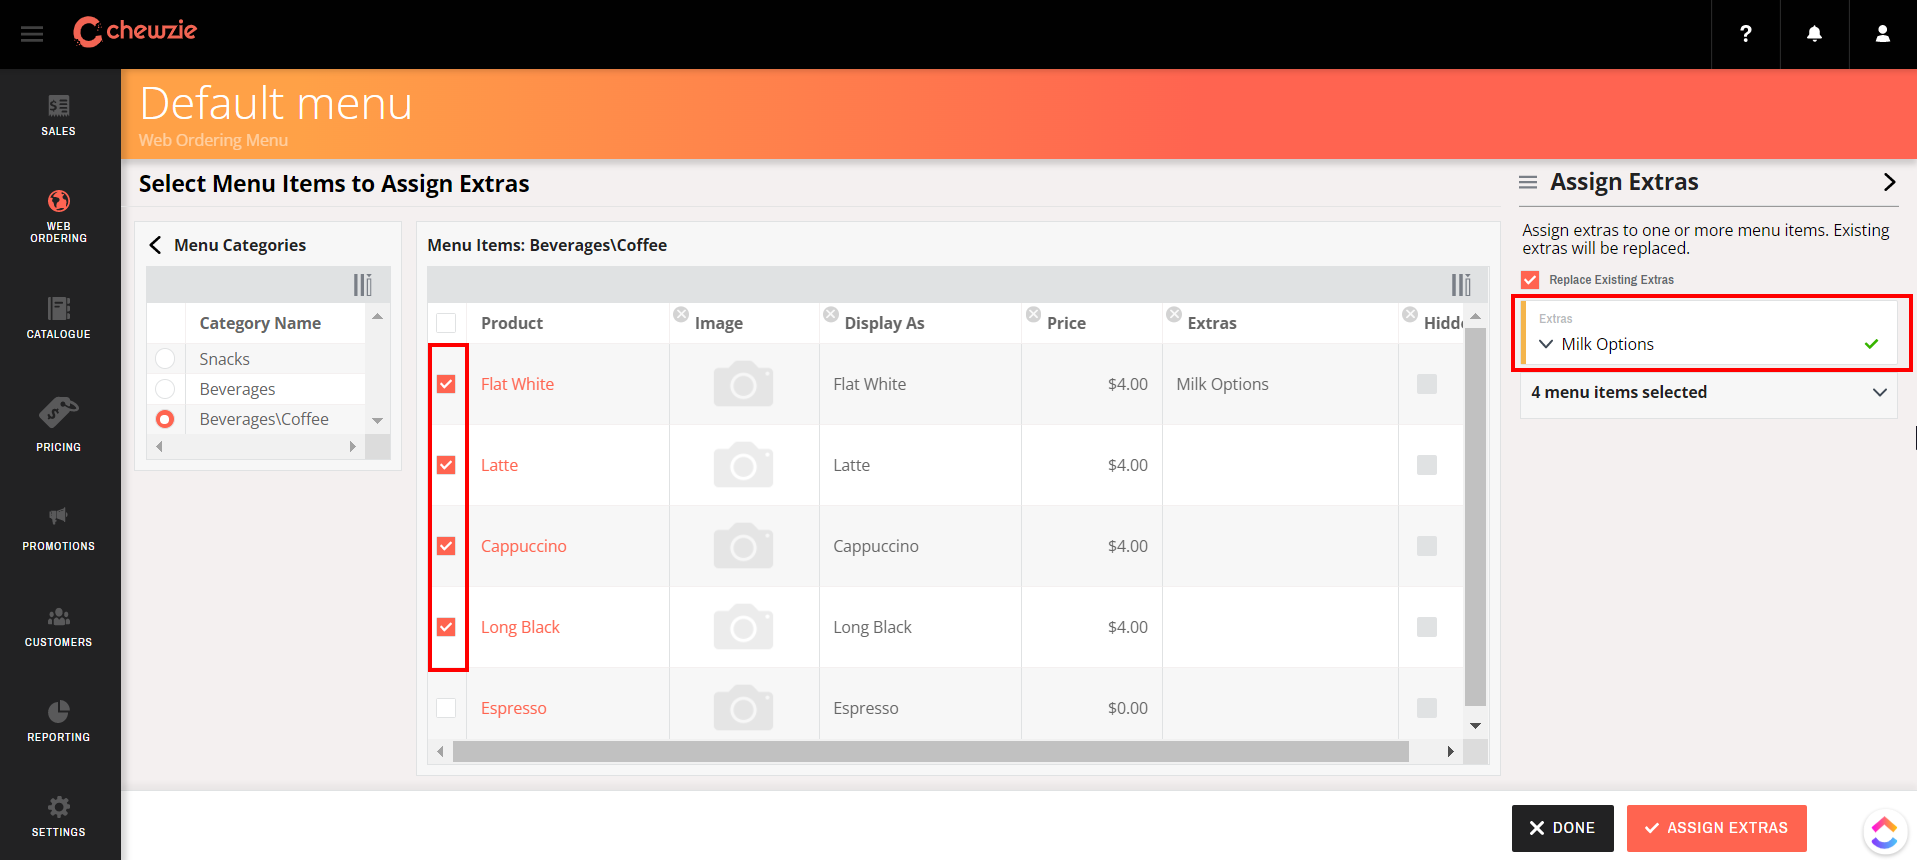
TIP! - When adding an extra, it will automatically replace any extras currently on the item. To avoid this, untick the Replace Existing Extras button in the top right hand corner.
Step 4: Click the Assign Extras button in the bottom right hand corner and save your menu.
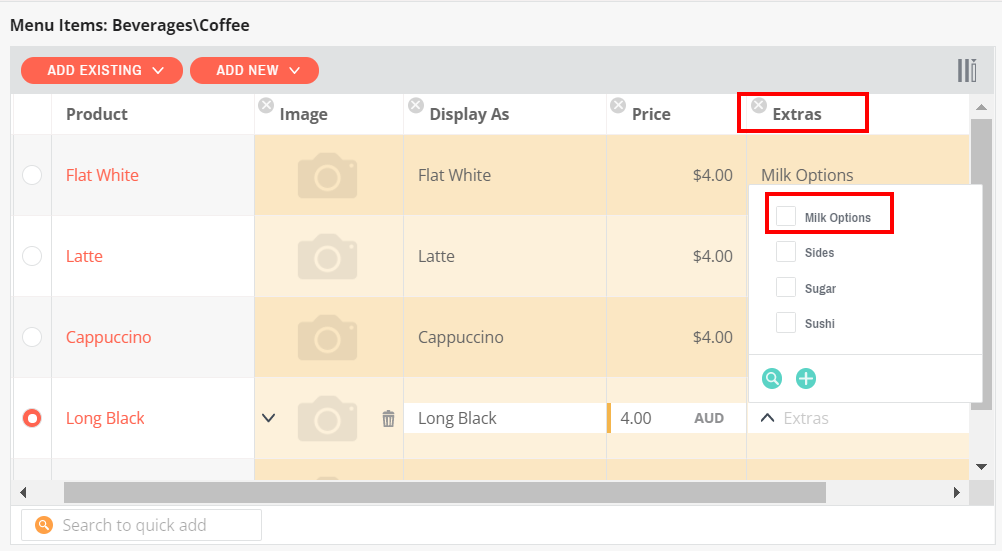
Step 5: Alternatively, if you want to add or remove an extra from an individual item, select the Extras column on the menu. Here you can search for and apply or remove any extras you want.
Be sure to save your menu when you're done.
Did this answer your question?